
Building websites for others (or even for yourself) is one of the most popular ways to make money online.
Whether you’re a complete beginner or have some experience in web design, you can turn your skills into a steady income.
The best part? You don’t need advanced coding knowledge to get started. With platforms like WordPress, Wix, Squarespace, and Shopify, you can create attractive, functional websites that people are willing to pay good money for.
In this guide, I’ll walk you through the steps of making money by building websites, covering everything from the types of websites you can build to practical tips on finding and pitching clients.
By the end, you’ll have a clear roadmap for turning your newfound (or existing) web design skills into a profitable business.
Types of Websites You Can Build
Different clients will have different needs. Here are the most common types of websites you may be asked to create:
1. Simple Business Websites
These usually have 3–5 pages (Home, About, Contact, Services, etc.).
Minimal functionality and straightforward design. They’re quick to build, especially with user-friendly platforms like Wix or Squarespace.
You can charge around $1,000 (or more) for these, depending on the complexity and your experience level.
2. E-commerce Websites
Sites with an online store, shopping cart, payment gateways, and possibly inventory management.
E-commerce websites have more features and require more setup (e.g., shipping, taxes, product pages).
Typically, $2,000–$5,000 or higher, depending on complexity. Popular platforms include Shopify and WordPress with WooCommerce.
3. Blogs
Websites primarily used for publishing articles. Clients may use them for personal branding, niche blogging, or content marketing.
You can build blogs on WordPress (most popular), Wix, or Squarespace.
Usually $1,500–$2,000, but can be higher if the client wants additional features like custom layouts, membership areas, or advanced SEO tools.
Step-by-Step Guide to Making Money by Building Websites
1. Learn the Basics of Website Building
First, you have to choose a platform to build a website.
WordPress, Wix, and Squarespace are beginner-friendly. If your client needs e-commerce, learn Shopify or WooCommerce on WordPress.
For general websites other than e-Commerce, it would recommend WordPress.org. It’s an open source platform and about 40% website on internet as based on WordPress.
Basic HTML and CSS can help you stand out. Even if you use drag-and-drop builders, knowing some code helps with customization.
Free and Paid Resources: Check out YouTube tutorials, online courses (Udemy, Skillshare), and community forums.
2. Build Your Portfolio
If you’re new, build a few demo sites (e.g., a mock restaurant site, a simple blog, a small e-commerce store).
Include different types of websites (business site, e-commerce, blog) to appeal to various clients.
Whenever possible, mention any outcomes you achieved—like improved design, increased leads, or better conversions.
3. Start Finding Clients
There are multiple strategies you can use:
Local Outreach: Look for local businesses without websites (or with outdated ones). You can find them on Google Maps or community business listings. Email or call them, explaining how a modern site can benefit their business.
Freelance Platforms: Upwork, Fiverr, and Freelancer. These can be competitive, so optimize your profile with a strong portfolio and clear pricing packages.

Social Media & Networking:
Showcase your work on Facebook, Instagram, LinkedIn or start a YouTube channel. Join local or industry-specific groups.
Share tips, success stories, and reviews from clients.
Referrals: Ask satisfied clients to recommend you to others. Offer a small referral discount if they send new business your way.
4. Price Your Work Fairly
Consider Complexity: An informational website with a few pages is faster to build than a large online store with hundreds of products.
Factor in Your Time: Include the hours spent on design, development, revisions, and any after-service support.
Set a Baseline: Even if you’re a beginner, try not to go below $1,000–$1,500 for a complete site. You want to establish your value early on.
Offer Maintenance Packages: Provide ongoing maintenance, security checks, and updates for a monthly or annual fee. This can create a reliable, recurring income stream.
5. Start Your Own Blog And Monetize it
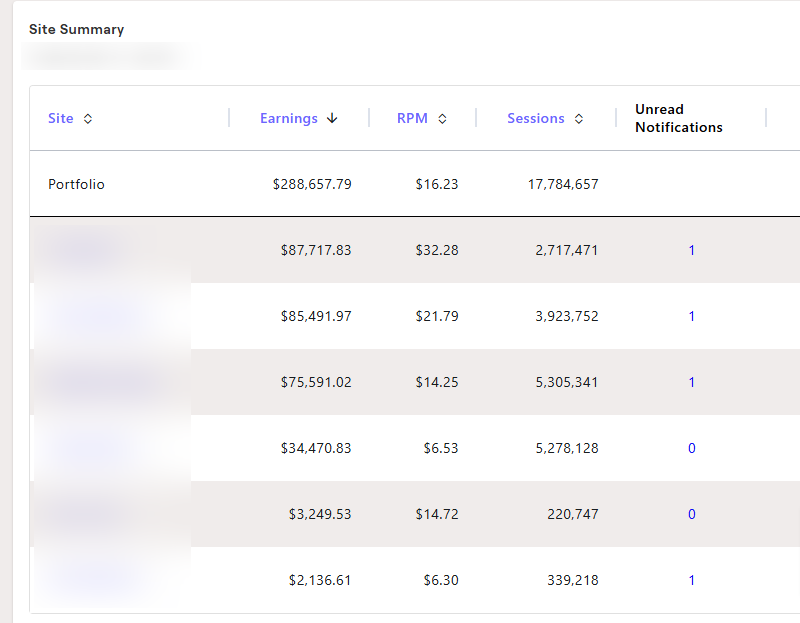
Blogging is a realistic way to make money online. Starting small, even aiming for just $500 monthly, can lead to substantial earnings.
In 2025, blogging remains attractive due to the flexibility, multiple income streams (ads, affiliate marketing, digital products), and the growing support from AI and automation.
Choosing a niche or micro-niche is critical for success. To start a blog, select a clear, memorable name, purchase a domain and hosting, set up WordPress, customize your blog’s appearance, and install essential plugins.
Monetizing methods include advertising (Google AdSense, Mediavine), affiliate marketing, sponsored reviews, selling digital products, or offering services.
Finally, driving traffic via SEO, social media (especially Pinterest), email marketing, and networking ensures your blog’s growth and profitability.
For a detailed guide, check out: How to Start a Blog and Make Money From Blogging
🖥️ Whether you’re designing sites for clients or flipping them for profit, Pinterest can actually help you generate traffic – or even land more clients.
I’ve worked with digital entrepreneurs who use Pinterest to promote their services and tutorials, and I offer tailored strategies and pin designs to help turn that into real clicks and conversions.
How to Build a Website on WordPress using Hostinger:
To build a website, you should have a domain name and a hosting provider (where the files and data of the site will be stored).
If your client already has have website and hosting purchased, you don’t need it, though.
However, if you are building a website for yourself or for someone who don’t own anything, you will need to buy a domain name and hosting.
1. Purchase Your Domain Name
After selecting the name for the website or your blog, the next step is to secure your domain name.
Here’s how:
Use a Reliable Registrar
Choose a reputable domain registrar such as NameCheap, GoDaddy, Bluehost, or Hostinger.
These platforms allow you to search for available domains and purchase them easily.
Also, we would suggest to purchase the domain name and hosting from the same provider. So, you don’t have to manage the domain name hosting seperately.
Select the Right TLD
While .com is the most recognized, other TLDs like .net, .org, or niche-specific ones like .blog can also work.
Choose a TLD that best fits your blog’s purpose and audience.
Register Your Domain
Once you’ve found an available domain name, proceed to register it.
Most registrars offer a simple checkout process where you can purchase your domain for a year or more.
Remember to enable domain privacy protection to keep your personal information secure.
2. Purchase Hosting
With your domain secured, it’s time to choose a hosting provider.
Hosting is where your blog’s files are stored and accessed by visitors. Here’s how to select the right hosting service:
Choose a Reliable Hosting Provider
Popular hosting providers for bloggers include:
- SiteGround
- Hostinger
- A2 Hosting
- BlueHost
On our blogs, we use Hostinger. Its quite reliable and offers some good features and is affordable.
Why Hostinger?
I recommend Hostinger for several reasons:
- Excellent Customer Support: 24/7 support to help you with any issues.
- High Performance: Fast loading times and reliable uptime.
- User-Friendly Interface: Easy to navigate, perfect for beginners.
- Great WordPress Integration: Seamless installation and management of WordPress.
- Free Domain Name and Free Daily Backup, Free SSL (Well, it may differ depending upon the plan you choose)
Select a Hosting Plan
Intially when starting out you don’t need any advance plan, even the basic one will work.
Start with an entry-level plan, such as the basic Hostinger Premium Plan, that start at $2.5 monthly, which is affordable and sufficient for new blogs.
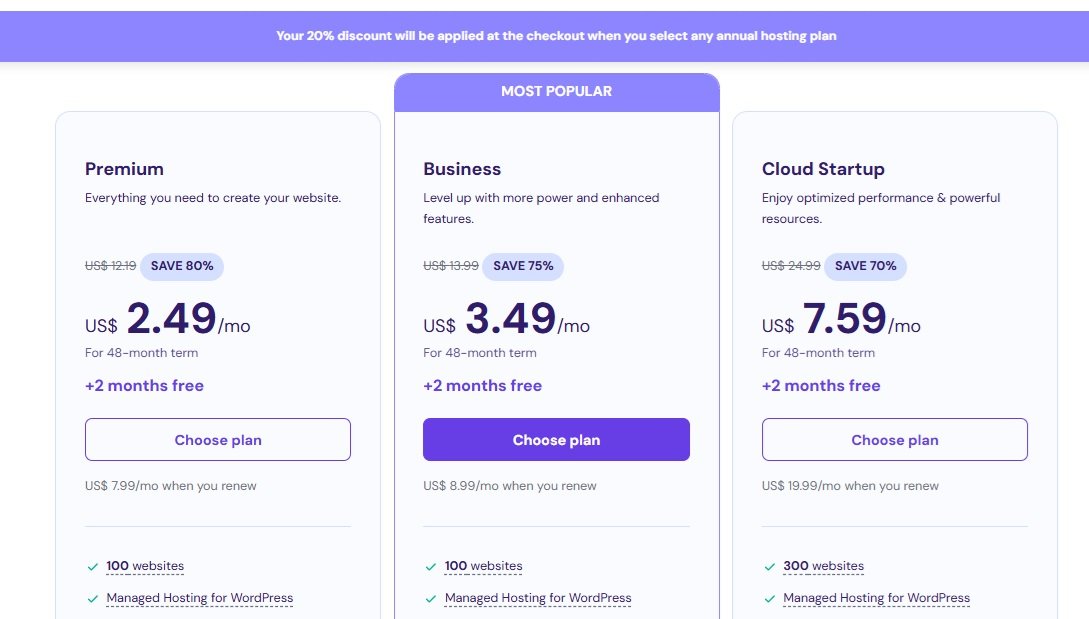
You can always upgrade as your blog grows.
Register and Host Your Domain
During the signup process, link your domain name to your hosting account.
If you registered your domain with a different registrar, Hostinger provides easy steps to connect them.
3. Install WordPress
WordPress is the most popular Content Management System (CMS) for bloggers, powering over 39.5% of all websites.
Here’s how to install it:
Use Hosting’s Installation Tool
Most hosting providers, including Hostinger, offer a one-click WordPress installation feature.
Simply follow these steps:
- Log in to your hosting account.
- Navigate to the WordPress installation section.
- Click Install Now and follow the on-screen instructions.
Set Up Your WordPress Account
During installation, create your WordPress administrator account.
This account will give you access to your blog’s dashboard, where you can manage content, settings, and plugins.
Access Your WordPress Dashboard
Once installed, access your dashboard by adding /wp-admin to your domain (e.g., www.yourblogname.com/wp-admin).
Log in with your admin credentials to start customizing your blog.
4. Design The Wesbite/Blog
A visually appealing design enhances user experience and keeps visitors engaged. Here’s how to design your blog effectively:
Choose a Responsive Theme
Select a WordPress theme that is mobile-friendly and responsive.
Popular options include:
- Astra: Lightweight and highly customizable.
- GeneratePress: Fast and flexible.
- OceanWP: Feature-rich and versatile.
We personally use GeneratePress on most of our blog as it is one of fastest and easy to use theme. Also, we can use it on multiple websites by purchasing it just once.
Customize Your Theme
Use the WordPress Customizer (Appearance > Customize) to adjust:
- Colors: Match your brand’s color scheme.
- Fonts: Choose readable and stylish fonts.
- Layout: Decide on sidebar placement, header style, and more.
Use a Page Builder
For advanced customization, use a page builder like Elementor:
- Install and activate the Elementor plugin.
- Use the drag-and-drop editor to create custom layouts.
- Add elements like content blocks, images, buttons, and forms.
Optimize for User Experience
- Navigation: Ensure your menu is easy to navigate with clear categories.
- Loading Speed: Optimize images and use caching plugins to improve speed.
- Readability: Use headings, bullet points, and short paragraphs to enhance readability.
Add Branding Elements
Incorporate your logo, consistent color palette, and unique design elements to establish your blog’s brand identity.
Test Your Design
Preview your blog on different devices (desktop, tablet, mobile) to ensure it looks great everywhere.
Make adjustments as needed to provide a seamless user experience.
How to create an E-commerce website for with Shopify
When you are creating an e-commerce, I would recommend only using Shopify.
It is the most popular platform to create e-commerce. Plus the add-ons or the apps available from different developers make all things work and connect seamlessly.

Step 1: Sign Up for Shopify
Visit shopify.com and sign up for a free trial.
Shopify provides a 3-day free trial without requiring credit card details.
After this period, you can extend your experience with Shopify’s Starter Plan or explore their affordable plans, but getting started is entirely free.
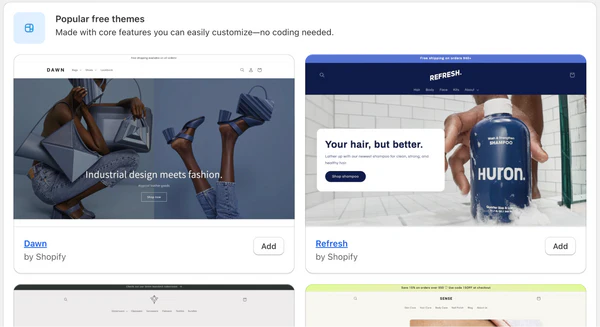
Step 2: Choose a Theme
Shopify offers numerous professionally designed free themes.
Navigate to your Shopify dashboard, select ‘Online Store’, then ‘Themes‘. Browse through the free themes, preview them, and pick one that suits your brand.
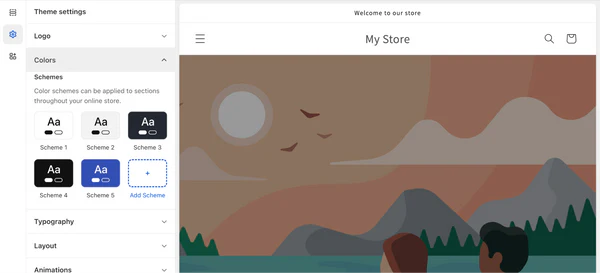
Step 3: Customize Your Store
Customize your chosen theme to reflect your branding. Add your logo, choose your colors, upload product photos, and write engaging product descriptions.
The user-friendly drag-and-drop editor allows even beginners to set up their store efficiently.
Step 4: Add Products
Go to your Shopify dashboard and select ‘Products‘.
Here, you can easily add new items by entering titles, descriptions, images, pricing, inventory details, and more.
You can organize your products into categories for easy browsing.

Step 5: Configure Payments and Shipping
Under ‘Settings‘, configure your payment gateways and shipping options.
Shopify Payments allows you to accept payments quickly without additional transaction fees.
You can also set shipping rates, either fixed or based on real-time carrier rates.
Step 6: Publish Your Store
Once your store is ready, you can publish it by removing the password protection under ‘Online Store > Preferences‘.
Your store is now live and ready for customers!
SEE ALSO:
- 5 Ways to Make Money on Pinterest
- SEO for Bloggers – The Essential Guide
- 15 Fun and Profitable Hobbies That Make Money
- How to Start a Blog and Make Money From Blogging (2025)
Final Words:
So, that’s all for now folks. I hope this guide help you in understanding the basic of how to build website and make money online.
Here are a quick short outline for the post:
Building websites can be a fun and rewarding way to earn money online. With the help of platforms like WordPress, Wix, or Shopify, you don’t need to be a coding expert to create beautiful sites that people will pay for.
Whether you’re designing a simple business website, an e-commerce store, or even your own blog, the steps outlined in this guide give you a clear path to start your journey.
Remember, practice makes perfect. Start small, build your portfolio, and soon you’ll gain the confidence and skills needed to land great clients.
Keep learning, stay creative, and let your passion for web design drive you forward. Happy building!
Note: Some of the links on this page are affiliate links, which means we may earn a small commission if you choose to make a purchase through them-at no extra cost to you. We only recommend products and services we genuinely believe in and find useful.