Pinterest is the most underrated medium for marketing, driving traffic to blogs, generate sales and make money online.
If you are looking for ways to increase your blog’s traffic, increase your sales, or increase engagement, and grow your audience, – Pinterest is the way to go.
Pinterest is not just the social media platform as most of the people think, it’s actually a visual search engine, where millions of people search for different ideas.
We have been using Pinterest to drive thousands of users to our websites and blogs and to earn money online.
If you haven’t started your blog yet, you can check out our detailed guide on how to start a money making blog.
If you are just starting to focus on Pinterest to generate sales of your products, or to drive traffic to your blog to make money with Pinterest, you need to set up the Pinterest account in the right way and optimize it for SEO just like any search engine.
So, in this guide below, we have explained all the details for optimizing Pinterest account, boards, Pins, Profile, etc., to get you started with the right Pinterest SEO strategies.
So, let’s dive in.
Pinterest: Essential Setup, Optimization, and Strategy Guide for Growing Your Blog
1. Creating Your Pinterest Account (Business)
To unlock the full potential of Pinterest for your blog, start by creating a Pinterest Business Account.
This is the basic mistake most beginners make while setting up the account with Pinterest.
Pinterest Business Account provides access to valuable analytics, advertising options, and other tools tailored for businesses and content creators.
Steps to set up :
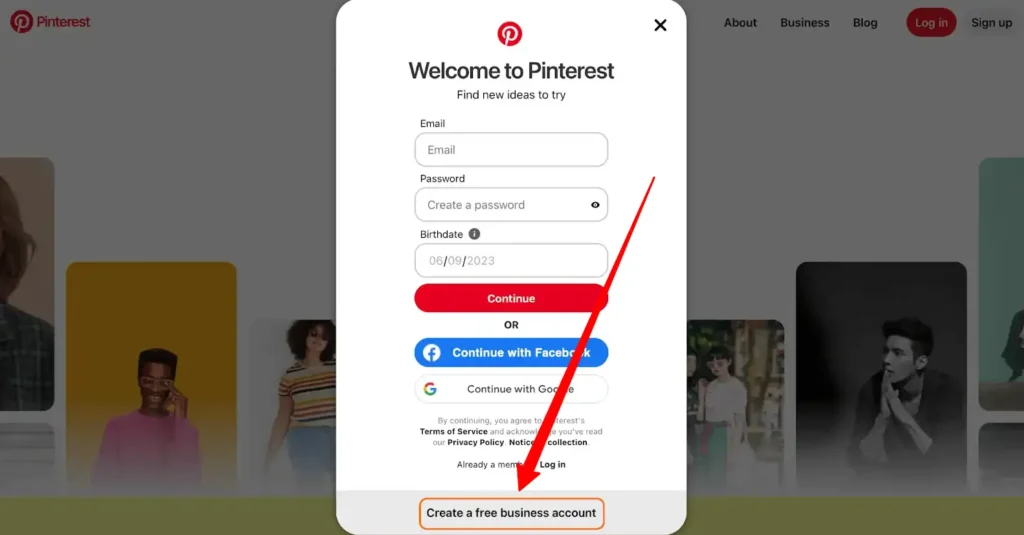
Go to Pinterest and click on the “Sign Up” button in the top right corner.
Then, select “Create a free business account” at the bottom of the screen.
In the next menu, fill in the required information to set up your account and get started.
In case you have already created your account and it’s a personal Pinterest account, do not worry.
You can easily convert the personal Pinterest account to the Pinterest Business account.
Converting Your Personal Pinterest Account to a Business Account:
- Log In: Sign into your personal Pinterest account.
- Access Settings: Click on your profile picture in the top-right corner and select the gear icon to open Settings.
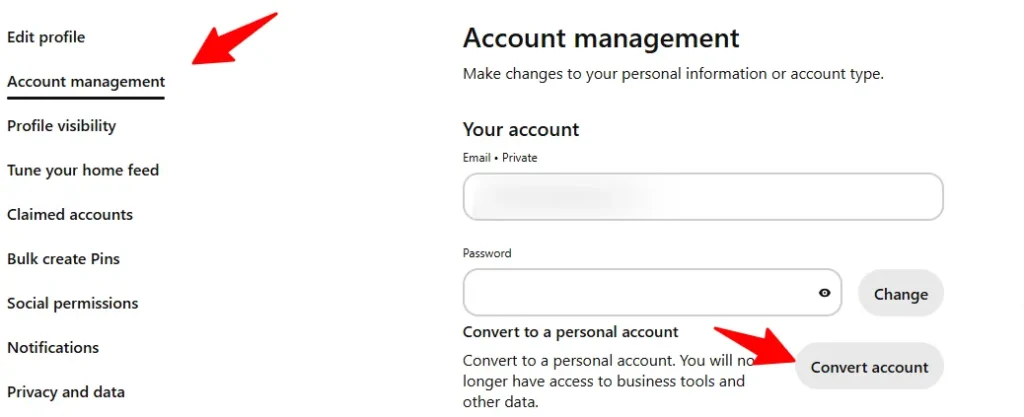
- Account Management: In the Settings menu, click on Account Management.
- Convert Account: Under the Convert to a business account section, click on Convert account.
By converting to a business account, you can take full advantage of Pinterest’s tools to drive more traffic to your blog and grow your online presence.
📌 When I first started with Pinterest, I thought I had everything set up right – but my traffic just wouldn’t grow. Turns out, I was missing key optimization steps that Pinterest actually cares about.
Since then, I’ve helped bloggers and creators fix their setup, clean up their boards, and optimize their profiles in a way that brings in results and not just impressions.
2. Claiming Your Website
One of the most important steps when starting out on Pinterest to drive traffic to your website is to claim your website.
Step-by-Step Guide to Claiming Your Website
Follow these detailed steps to claim your website on Pinterest and start reaping the benefits:
1. Log into Your Pinterest Business Account
To claim your website, you need to have a Pinterest Business Account.
If you haven’t already, convert your personal account to a business account or create a new one by visiting Pinterest for Business.
2. Access the Settings
Once logged in, navigate to your profile by clicking on your profile picture in the top-right corner.

From there, click on the downward arrow next to the “Follow” button and select Settings from the dropdown menu.
3. Claim Your Website
In the Settings menu, find and click on ‘Claimed accounts‘ section on the right side. Under ‘Websites’ click ‘Claim‘.

4. Choose Your Verification Method
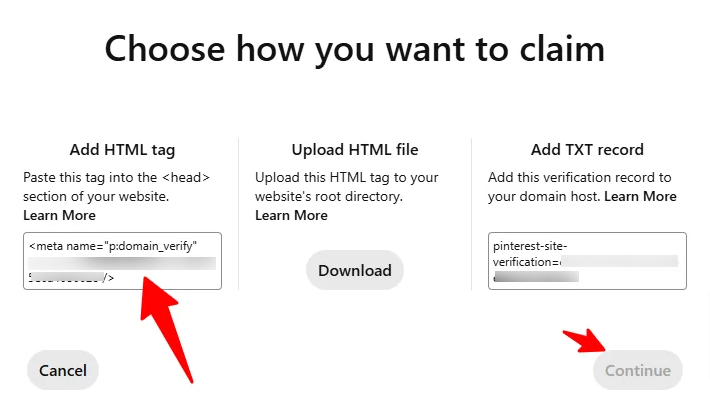
Pinterest offers three methods to verify your website, but adding the meta tag to website is the simplest.
Add a Meta Tag to Your Website
Copy the Meta Tag: Pinterest will provide a unique meta tag. Copy this code snippet.
Enter Your Website URL: Input the full URL of your blog (e.g., https://www.yourblogname.com) and click Verify.
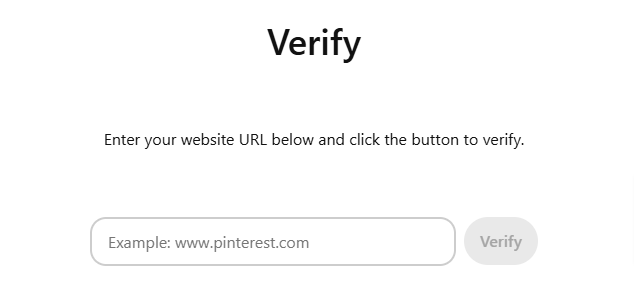
Insert the Meta Tag:
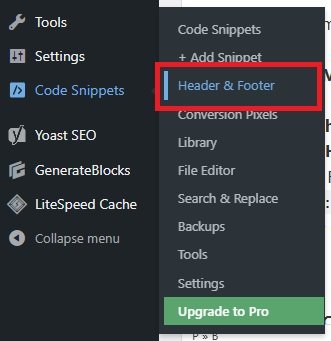
For WordPress Users: Use a plugin like Insert Headers and Footers (now known as WP Code) to add the code.
For Other Platforms: Access your website’s HTML or CMS settings and paste the meta tag within the <head> section of your homepage.
Verify: Once the meta tag is added, return to Pinterest and click Next to verify. Pinterest will check for the meta tag and confirm your ownership.
There are other two methods to verify and claim your website. But, we use and only recommend this method as it’s easy and simple.
If you want to verify the site using other methods, you can check this guide by kinsta.
5. Confirm Your Claim
After successfully adding the meta tag or uploading the HTML file, Pinterest will verify your ownership.
Once confirmed, your website will be marked as claimed in your Pinterest settings.
3. Optimizing Your Profile Name and About
Profile Name:
Your Pinterest profile is the first impression visitors have of your brand, so it’s crucial to make it both memorable and informative.
Here’s how to optimize your profile name and about section to attract and engage your target audience:
Choose a Memorable Profile Name and Include main Keywords in the Profile Name itself:
Your profile name should reflect your blog’s identity and be easy to remember.
If possible, use your blog’s name to maintain consistency across platforms. This helps with brand recognition and makes it easier for users to find you.
Include Keywords: Incorporate relevant keywords related to your niche.
For example, if your blog is about healthy living for women, use a profile name like
“Your Name/Your Brand Name | The main keyword (healthy living for Women)”
For example: 
Adding the main keywords of your blog to the profile name is a must as it helps in SEO.
Overall, keep It Simple and avoid using complicated or lengthy names. A simple, clear name is easier to remember and search for.
Profile Bio/About:
Your bio is a brief introduction that tells visitors who you are and what your blog is about.
It’s essential to make it engaging and informative.
- Be Clear and Concise: Clearly state what your blog offers.
- Use Keywords: Just like with SEO for your pins, include keywords that your target audience might use to find content like yours. This improves your profile’s visibility in Pinterest searches.
For example, see how the keywords are included for this account in the about section:

- Show Personality: Let your personality shine through. Whether you’re fun and quirky or professional and informative, your bio should reflect the tone of your blog.
- Include a Call to Action: Encourage visitors to take action, such as visiting your blog or following your profile.
Example: “Follow us for daily inspiration and tips on living a healthier life!”
Add a Professional Profile Picture
Your profile picture is a key element of your branding. It should be clear, high-quality, and representative of your blog.
If you have a logo, use that for brand consistency. If you prefer a personal touch, a professional headshot works well.
The image should be sharp and easily recognizable, even at smaller sizes.
Include Your Blog’s URL
Make sure to add your blog’s website link to your Pinterest profile.
This directs traffic directly to your blog and helps in building your online presence.
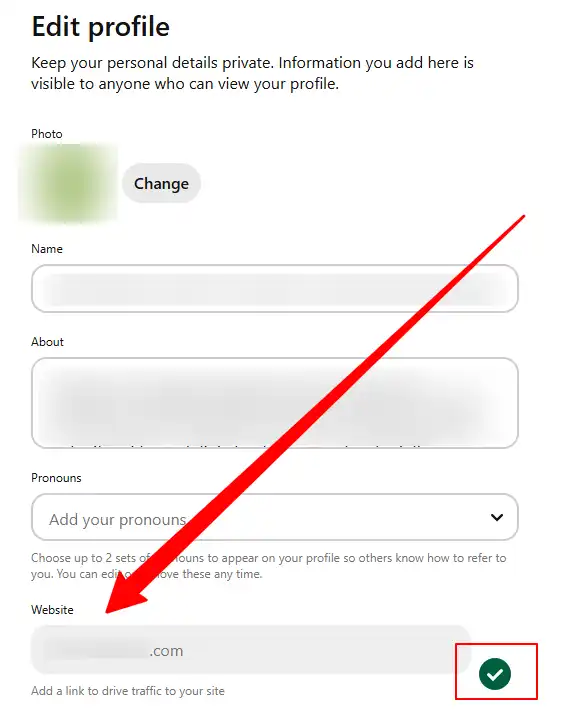
Both your profile name and bio should be optimized for searchability.
Think about what terms your audience might use to find content like yours, and incorporate those naturally into your profile elements.
By optimizing your profile name and about section, you create a strong foundation that attracts the right audience and encourages them to explore your content further.
4. Setting Up and Optimizing Boards Strategically
Boards are the heart of your Pinterest account, organizing your content into categories that make it easy for users to find what they’re interested in.
Setting up and optimizing your boards strategically can significantly boost your blog’s visibility and traffic.
Create Relevant and Specific Boards
Start by creating boards that align with your blog’s main topics.
Each board should focus on a specific theme to attract a targeted audience.
Be Specific:
Instead of a broad board like “Recipes,” create more specific boards such as “Quick Breakfast Recipes,” “Vegan Desserts,” or “Healthy Snacks.”
Reflect Your Niche:
Ensure that each board reflects the core aspects of your blog.
For example, if your blog is about travel and wellness, create separate boards for “Travel Tips” and “Wellness Retreats.”
Use Keyword-Rich Titles and Descriptions
Optimizing your board titles and descriptions with relevant keywords enhances their discoverability in Pinterest searches.
Just like we have included the relevant keyword in the Profile name and Profile bio or about section, we have to include the relevant keywords for each board name and board description.
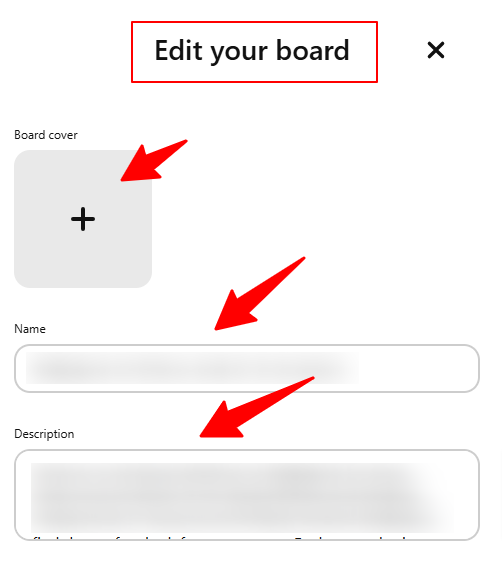
Organize Boards by Priority
Order your boards in a way that highlights your most important and popular topics first.
Pinterest allows you to rearrange your boards, so place the ones that are most relevant to your audience at the top.
Pro Tip: Keep all your boards fresh by regularly adding new pins and removing outdated ones. This keeps your profile active and engaging.
Here is a Pinterest Board Description Template for SEO Optimization:
This board features the best of (board topic/keyword), including (related keyword 1) and (related keyword 2). Whether you’re looking for (keyword variation or user intent), inspiration, or how-tos, you’ll find everything here. We share expert tips, creative ideas, and resources related to (main keyword phrase) to help you (benefit statement). Explore more at (your website URL).
To learn more about board, check out our detailed guide: How to Organize Your Pinterest Boards (to Get More Traffic)
5. Optimize Pin Titles and Descriptions
Optimizing your pin titles and descriptions is essential for improving your pins’ visibility in Pinterest searches and encouraging users to click through to your blog.
Just like we have optimized the Pinterest Profile and Boards, you have to optimize each pin for SEO.
Just like SEO for your blog posts, adding relevant keywords into your pin titles and descriptions helps your pins appear in search results.
Note: Integrate keywords naturally into your titles and descriptions, without keyword stuffing.
Your pin title should immediately convey the value or topic of your blog post, enticing users to click through.
Be Specific: Clearly state what the pin is about.
For example, instead of “Delicious Recipes,” use “10 Quick and Healthy Breakfast Recipes.”
Highlight Benefits: Emphasize what users will gain by clicking your pin. Example: “Boost Your Productivity with These 5 Simple Hacks.”
Optimize for Mobile Users
Many Pinterest users access the platform via mobile devices, so ensure your titles and descriptions are concise and easily readable on smaller screens.
Keep It Brief: Aim for titles under 100 characters and descriptions under 200 characters to ensure they display fully on mobile.
Place the most crucial details and keywords at the beginning of your titles and descriptions.
Add Tags to Your Pins
Adding relevant tags to each pin is crucial for boosting your pins’ visibility on Pinterest.
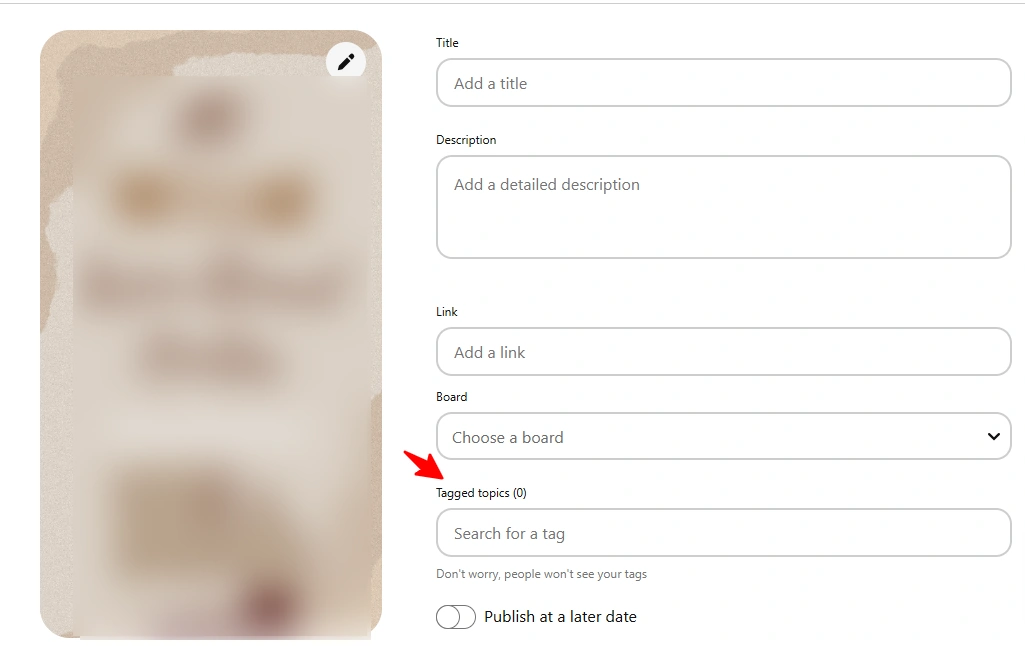
Use 3-5 targeted hashtags that accurately describe the content of your pin. Start by researching popular keywords in your niche and incorporate them naturally into your pin descriptions.
This helps Pinterest categorize your pins correctly, making them easier for your target audience to find.
Properly tagged pins can significantly increase your reach and drive more traffic to your blog.
Add Alt Text
When adding a pin also add an ‘Alt Text’ for the image.
If you aren’t aware, Alt text (alternative text) is a short, descriptive text that explains what an image on a Pin contains.
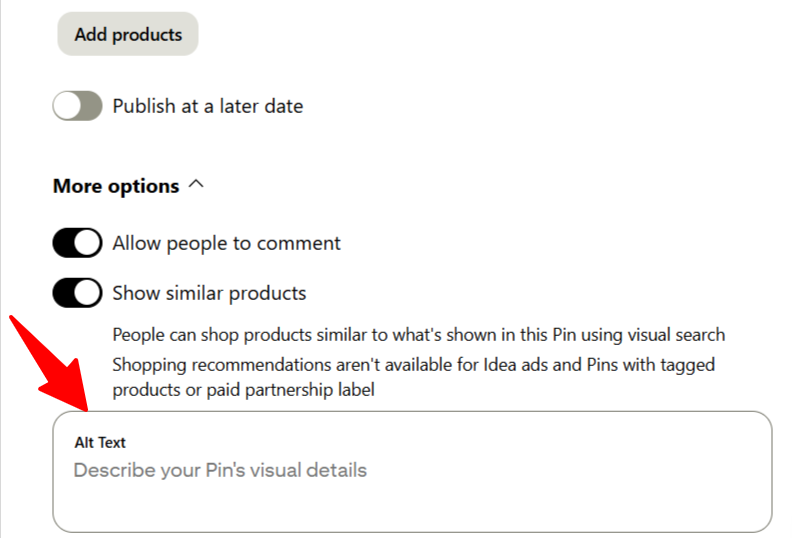
So, it helps Pinterest to understand what your image is about, which in turn helps to boost the visibility of your pin.
SEE ALSO:
- How to use Pinterest Trends Tool | Guide
- How to Boost your Pinterest Traffic even with Low Impressions
- Pinterest Advanced Keyword Research Guide
- 5 Ways to Make Money on Pinterest
Final Words
And that brings us to the end of our comprehensive guide on Pinterest 2025: Essential Setup, Optimization, and Strategy Guide for Growing Your Blog.
Now, you have all the tools and knowledge to set up your Pinterest account, optimize your profile and boards, and implement effective strategies to drive traffic to your blog.
Start applying these tips today and watch your blog’s visibility and audience grow.
My job is done. And yours begins. If you encounter any challenges or have questions while optimizing your Pinterest strategy, feel free to drop a comment below.
Remember, every successful blogger started where you are now. Stay dedicated, keep experimenting, and enjoy the growth of your blog in 2025!
Note: Some of the links on this page are affiliate links, which means we may earn a small commission if you choose to make a purchase through them-at no extra cost to you. We only recommend products and services we genuinely believe in and find useful.


